
")
We need to have a serious conversation about cookies. I have spent the better part of the last decade trying to crack the code on the perfect chocolate chip cookie. I’m talking about the kind of cookie you see behind the glass at a high-end bakery in New York City—the kind that’s massive, undeniably thick, loaded with absurdly large pools of melted chocolate, and finished with a heavy sprinkle of flaky sea salt. Also be sure to try our New York-style cheesecake.
You probably have a recipe memorized from the back of a yellow bag of chocolate chips. It’s nostalgic, sure. But we can do better. We can do so much better. What I’m sharing with you today isn’t just a nostalgic throwback; it’s a meticulously tested, bakery-style masterpiece.
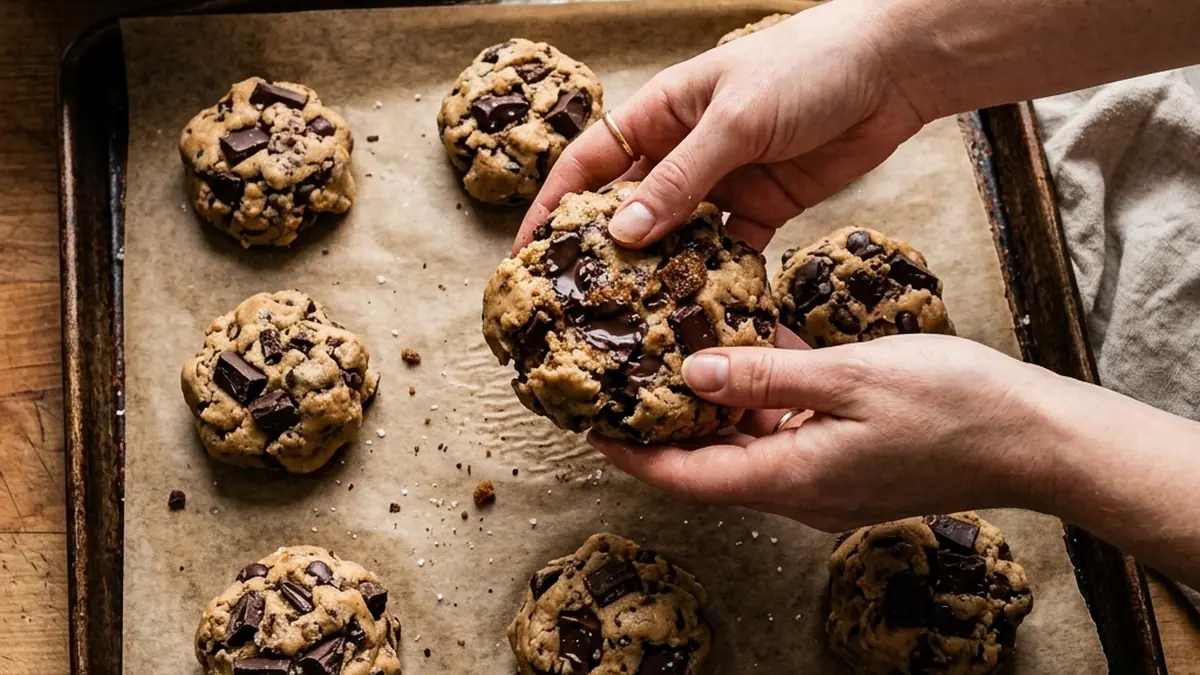
This isn’t a thin, crispy wafer that shatters when you bite into it. And it certainly isn’t a cakey, dome-shaped disappointment. It is the absolute sweet spot: golden, caramelized, and slightly crispy around the outer rim, giving way to an incredibly soft, gooey, almost underbaked center.
Why This Chocolate Chip Cookie Recipe Works Every Time
The secret to a truly life-changing cookie isn’t just about the ingredients—it’s about the temperature and the resting time. Let’s start with the butter. Most recipes tell you to use room-temperature butter. We are ignoring that. We are browning the butter. Taking the time to melt your butter on the stove until the milk solids toast and turn a deep, nutty brown completely transforms the flavor profile of the dough. It adds a layer of rich, butterscotch warmth that standard softened butter simply cannot provide.
Second, we have to talk about the sugar ratio. White sugar gives you crispy edges and spread. Dark brown sugar (which contains more molasses than light brown sugar) gives you moisture, chewiness, and depth. We are heavily favoring the dark brown sugar here to guarantee that thick, chewy texture.
And finally, the most agonizing but crucial step: the chill. You cannot bake this dough right away. If you put warm, freshly mixed dough into a hot oven, the butter will melt instantly, and you’ll end up with flat, greasy puddles. You must let this dough rest in the fridge for at least 24 hours. I know it’s hard to wait, but the flour needs time to hydrate, and the flavors need time to meld. Trust the process.
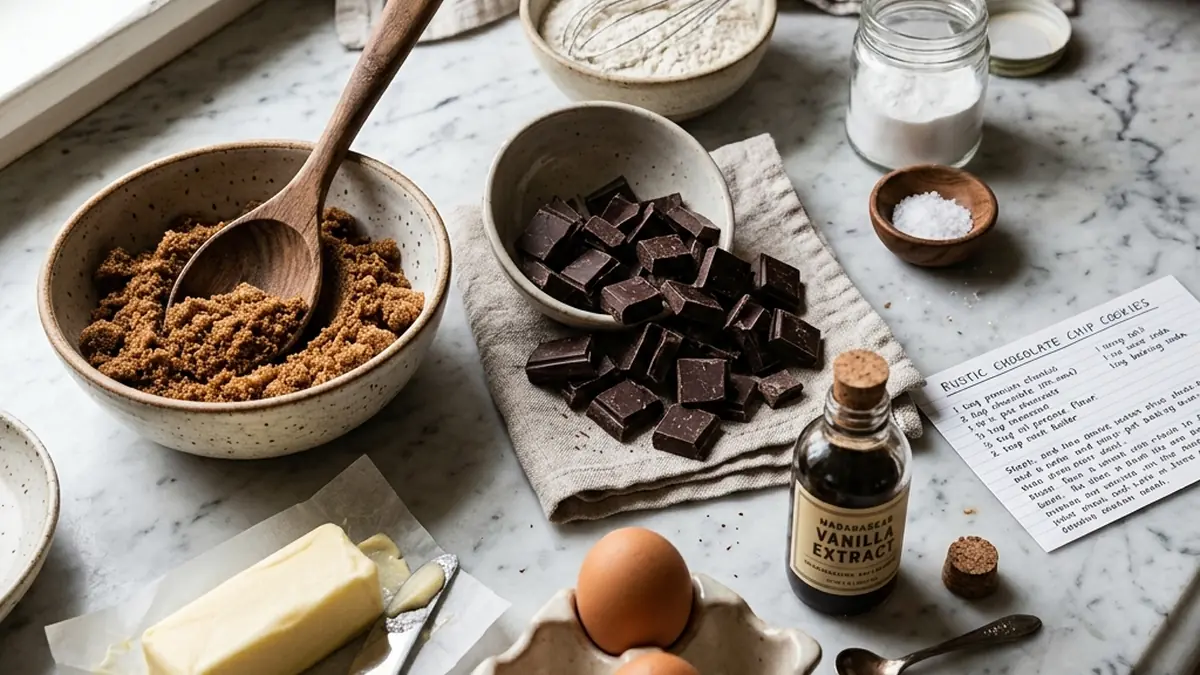
Essential Ingredients for this Chocolate Chip Cookie Recipe
Because there are so few ingredients in cookies, the quality of what you buy matters immensely. Now is not the time to skimp.
- The Flour: A mix of all-purpose flour for structure and a little bit of bread flour for extra chewiness.
- The Butter: Unsalted, high-quality European butter. Since we are browning it, you want something with a good fat content.
- The Sugar: Mostly dark brown sugar (make sure it’s fresh and soft!) with just enough granulated white sugar for those crispy edges.
- The Chocolate: Throw away the tiny semi-sweet chips. We are using massive bars of high-quality dark chocolate (around 70% cacao) roughly chopped with a serrated knife. You want a mix of huge chunks and fine chocolate dust.
- The Vanilla: Pure vanilla extract. Measure with your heart, but use at least a tablespoon.
- The Salt: Kosher salt in the dough, and a heavy pinch of flaky Maldon sea salt pressed into the top as soon as they come out of the oven.
The Mixing and Baking Process
Start by browning your butter in a saucepan over medium heat. Swirl it constantly. It will foam up, and then you’ll start to see little brown specks at the bottom. As soon as it smells nutty and intoxicating, pour it into a heat-proof bowl and let it cool slightly.
Whisk your sugars into the warm browned butter until smooth, then whisk in your eggs (straight from the fridge is fine here) and vanilla. In a separate bowl, whisk together your flours, baking soda, and salt. Gently fold the dry ingredients into the wet ingredients using a rubber spatula. Stop mixing when you still see a few streaks of flour!
Now, fold in those massive chocolate chunks. The dough will look like it has too much chocolate. That means you did it right. Scoop the dough into large, rustic balls (about 3 to 4 tablespoons each)—do not roll them into perfectly smooth spheres; you want the craggy edges for texture.
The Crucial Chill and the Final Bake
Cover the dough balls tightly and place them in the refrigerator for 24 to 48 hours. When you are finally ready to bake, preheat your oven to 350°F (175°C).
Place the cold dough balls onto a parchment-lined baking sheet, leaving plenty of room between them. Bake for exactly 11 to 13 minutes. You are looking for edges that are set and golden brown, but a center that still looks pale, puffy, and completely underbaked. Do not leave them in the oven until the center looks done, or they will be dry!
Pull them out of the oven and immediately slam the baking pan down on the counter once or twice. This deflates the cookies slightly and creates those beautiful, wrinkly edges. Hit them with a pinch of flaky sea salt while they are still hot.
Let them cool on the pan for at least 10 minutes before you even attempt to move them. They need this time to finish setting up. When you finally break one in half, you’ll be met with that glorious, warm chocolate stretch. Pour a glass of cold milk and enjoy the absolute best cookie of your life.
")

